Configuring Exchange on-premises for One-Touch Join
This topic describes how to configure Microsoft Exchange in order to implement Pexip Infinity's One-Touch Join feature in a Microsoft Exchange on-premises environment.
The process involves the following steps, described in detail in the sections that follow:
-
Creating a service account for One-Touch Join. This service account will be used by One-Touch Join to read each room resource's calendar.
This should be a different service account to that used for VMR Scheduling for Exchange, because the configuration will be different.
-
Configuring Application Impersonation on the service account.
For more information and guidelines on the use of application impersonation in Exchange, see Permitting the service account to access calendars.
- Enabling basic authentication for the service account.
- Configuring calendar processing within Exchange.
-
Creating an associated Exchange integration on Pexip Infinity.
Prerequisites
Before you begin, ensure that the following configuration is complete:
- Ensure each physical room that will have a One-Touch Join endpoint in it has an associated room resource with an email address.
-
Enable auto calendar processing for each room resource, so that the room will automatically accept meeting requests if it is available, and automatically decline an invitation if it is already booked.
-
Ensure you have access to your Exchange Admin Center (EAC) web interface, and access to Exchange Management PowerShell.
- If your Exchange server does not use a globally trusted certificate, you must upload a custom CA certificate.
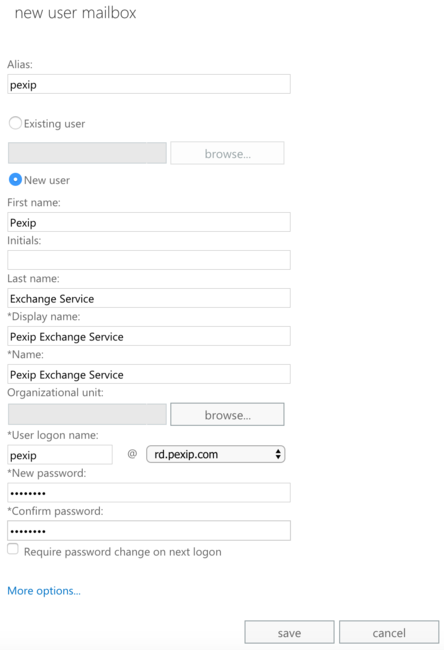
In this step, you create a service account that will be used to log in to Exchange to access the calendars of the room resources being used for One-Touch Join.
This service account should not be used for any other purpose other than One-Touch Join. You can however use the same service account for multiple One-Touch Join
You can create a new service account using either EAC or PowerShell, as follows:
| EAC | PowerShell |
|---|---|
|
The first command lets the administrator type in a password for the service account as a secure string. This password variable is then used in the second command to create a mailbox for the service account. The third command ensures the password of the service account will not expire. $password = Read-Host "Enter password" -AsSecureString New-Mailbox -Name "<Account Name>" -UserPrincipalName "<UPN>" -Password $password -Alias "<Account Alias>" -FirstName "<Account First Name>" -LastName "<Account Last Name>" -DisplayName "<Account Name>" Set-ADUser -Identity "<UPN>" -PasswordNeverExpires $true For example: New-Mailbox -Name "Pexip OTJ Service Account" -UserPrincipalName pexip-otj-svc@example.com -Password $password -Alias pexip-otj-svc -FirstName "Pexip OTJ" -LastName "Service Account" -DisplayName "Pexip OTJ Service Account" Set-ADUser -Identity pexip-otj-svc@example.com -PasswordNeverExpires $true |
In this step, you create a new Distribution Group, and add the rooms to be used for One-Touch Join to the group. You then use PowerShell commands to make it so that the service account will only be able to impersonate members of that Group.
Configuring Application Impersonation in this way means that if rooms are added or removed from the group, this automatically updates whether or not the service account can impersonate them.
Creating a new Distribution Group
- Log in to your as an administrator and go to recipients > groups.
- Select the + icon and select add a new Distribution Group.
-
Add the rooms you want to impersonate to the group.
Note that the service account should not be added as a member of this distribution group. Instead, this step allows the service account to impersonate any member of this distribution group (i.e. any of the room resources).
- Make sure to uncheck the option to make the group owner a group member. Otherwise the service account will be able to impersonate your account.
- Also make sure to lock the group down so people cannot accidentally add themselves as group members. Do this by selecting Closed: Members can be added / removed only by the group owners.
Configuring application impersonation
We recommend that you use combined PowerShell commands to configure application impersonation for the service account. This allows you to use variables, thus reducing possible copy and paste errors.
-
Configure the following variables with the values you actually want to use:
- otj_group_id: the email of the distribution list whose members you want to be impersonated.
- otj_service_account: the email of the service account you want to grant impersonation to.
- management_scope_to_create: the name you want the newly created management scope to have.
- impersonation_role_name_to_create: the name you want the newly created impersonation role to have.
For example:
$otj_group_id = "otjrooms@example.com"
$otj_service_account = "pexip-otj-svc@example.com"
$management_scope_to_create = "OTJ Management Scope"
$impersonation_role_name_to_create = "OTJ Impersonation"
-
Create the management scope:
$otj_group = Get-DistributionGroup -Identity $otj_group_id
$otj_group_dn = $otj_group.DistinguishedName
$restriction_filter = "MemberOfGroup -eq ""$otj_group_dn"""
New-ManagementScope -Name $management_scope_to_create -RecipientRestrictionFilter $restriction_filter
Example output:
Name                  ScopeRestrictionType Exclusive RecipientRoot RecipientFilter
----                  -------------------- --------- ------------- ---------------
OTJ Management Scope  RecipientScope       False                   MemberOfGroup -eq 'CN=OTJ Rooms20190430164340,OU...
-
Set up application impersonation using the previously created management scope:
New-ManagementRoleAssignment -Name $impersonation_role_name_to_create -Role ApplicationImpersonation -User $otj_service_account -CustomRecipientWriteScope $management_scope_to_create
Example output:
Name                Role              RoleAssigneeName  RoleAssigneeType  AssignmentMethod  EffectiveUserName
----                ----              ----------------  ----------------  ----------------  ----------------
OTJ Impersonation   ApplicationImp... pexip-otj-svc     User              Direct
-
Verify that the above commands worked as expected. In the following command, replace <resource_email> with the email of the room resource mailbox you want to test. If it is a room which is a member of the distribution list, it should show the OTJ Impersonation in the returned roles. If it is anything else outside of the distribution list, it should not have the OTJ Impersonation listed, which means the OTJ service account does not have permission to impersonate that user.
Get-ManagementRoleAssignment -Role ApplicationImpersonation -WritableRecipient "<resource_email>" | Format-List Name, Role, RoleAssignee, CustomRecipientWriteScope
Expected output:
Name                      : OTJ Impersonation
Role                      : ApplicationImpersonation
RoleAssignee              : pexip-otj-svc
In this step, you enable basic authentication for the service account that One-Touch Join uses to log in to Exchange.
If you are using on-prem Exchange you need to ensure basic authentication is enabled for Exchange Web Services (EWS). When basic authentication is enabled, Pexip Infinity stores the credentials in encrypted form and all authentication is carried out over a secure TLS channel.
You can enable basic authentication using either Windows Service Manager or PowerShell, as follows:
| Windows Service Manager | PowerShell |
|---|---|
|
This command enables basic authentication on a specific server: Set-WebServicesVirtualDirectory -Identity "<server>\EWS (Default Web Site)" -BasicAuthentication $true For example, if your server name is PEXCHANGE then: Set-WebServicesVirtualDirectory -Identity "PEXCHANGE\EWS (Default Web Site)" -BasicAuthentication $true |
In this step, you change the calendar processing settings for room resources from the default to those required to support One-Touch Join.
Recommended configuration
In order to take full advantage of the functionality offered by Pexip Infinity One-Touch Join, we recommend that, for One-Touch Join room resources, you change three calendar processing options from the default.
-
Firstly, when a meeting invite is received by a resource mailbox, by default the meeting subject is deleted and is replaced with the name of the organizer (for more information, see https://support.microsoft.com/en-gb/help/2842288/resource-mailbox-s-calendar-shows-the-organizer-s-name-instead-of-the).
Because One-Touch Join accesses the meeting invites through the resource mailboxes, this default behavior means One-Touch Join won't have access to the original subject. You can choose to leave the default behavior for privacy reasons, or you can modify the calendar processing options for each mailbox so that the meeting subject is available to One-Touch Join and can be displayed on the meeting room endpoints.
- Secondly, by default the meeting invite body is deleted. If you wish One-Touch Join to parse meeting details from the body then you must set the DeleteComments property to False. If you leave this set to True, only those rules that process information in the calendar headers can be used (because the body will be deleted).
- Thirdly, by default the private flag is cleared. If you wish meetings that are marked as private by the organizer to remain marked as private in the room mailbox, you must set the RemovePrivateProperty flag to False.
PowerShell command
To modify the calendar processing on a room from the default settings to those we recommend for One-Touch Join, use the following PowerShell command (replacing resource_email with the address of the room resource whose processing you wish to change):
Set-CalendarProcessing -Identity <resource_email> `
-DeleteSubject $False `
-AddOrganizerToSubject $False `
-DeleteComments $False `
-RemovePrivateProperty $False
Optional configuration
Hiding invitation details from other users
In order for One-Touch Join to function fully, the service account must be able to access the body of the invitation (which is why we recommend that you set the DeleteComments property to False). However, this does mean that all other users in your deployment with access to the room resource calendar may also be able to view the body of the invitation (depending on your deployment's other policies). If you wish to prevent this, you can use the following PowerShell command to restrict what users can see by default, without restricting what the service account can access.
In the following command, replace resource_name with the name of the room resource, and replace role with one of the following roles:
- AvailabilityOnly: users will be able to view the room's availability, but nothing else
- LimitedDetails: users will be able to view the room's availability and the meeting subject and location, but not the body of the invitation.
Set-MailboxFolderPermission "resource_name:\Calendar" -User Default -AccessRights role
Allowing forwarding of external invitations
If you want to enable users to forward invitations from other organizations to your OTJ room resources, you must set the ProcessExternalMeetingMessages flag to True. This also allows users external to your organization to invite the resource directly; you should therefore consult your Exchange administrator to determine whether this is appropriate in your environment.
If your Microsoft Exchange environment uses a security application (such as Office 365 ATP, or Mimecast) to re-write URLs, this may prevent OTJ from being used to join external Microsoft Teams meetings (for example, when a user inside your organization forwards an external Microsoft Teams meeting invitation to an OTJ room resource in order to join the meeting from that endpoint). To enable users to join these meetings using OTJ, you must ensure that the security application's URL re-write rules include an exception for any URL starting with the domain https:\\teams.microsoft.com\
Checking calendar processing settings
The following PowerShell command can be used to check calendar processing settings on all of the rooms in the Distribution Group that was created for One-Touch Join.
We recommend copying and saving this as a file and running it from within PowerShell.
Before running, ensure that you edit $otj_group_id = "otjrooms@example.com" to use the email of the Distribution Group used in your own deployment.
$deleted_subjects = @()
$organizer_added = @()
$deleted_bodies = @()
$private_flag_reset = @()
$not_auto_accept = @()
$process_external = @()
$otj_group_id = "otjrooms@example.com"

Get-DistributionGroupMember -Identity $otj_group_id -ResultSize Unlimited | ForEach-Object {
Write-Host "Checking room '$($_.name)'"
$processing = Get-CalendarProcessing -Identity $_.name
$pass = $true
if ($processing.DeleteSubject) {
Write-Host "WARNING: The room '$($_.name)' is deleting the meeting subject" -ForegroundColor Red
$deleted_subjects += $_.name
$pass = $false
	}
if ($processing.AddOrganizerToSubject) {
Write-Host "WARNING: The room '$($_.name)' is adding the organizer to the meeting subject" -ForegroundColor Red
$organizer_added += $_.name
$pass = $false
	}
if ($processing.DeleteComments) {
Write-Host "WARNING: The room '$($_.name)' is deleting the meeting body" -ForegroundColor Red
$deleted_bodies += $_.name
$pass = $false
	}
if ($processing.RemovePrivateProperty) {
Write-Host "WARNING: The room '$($_.name)' is clearing the private flag on meetings" -ForegroundColor Red
$private_flag_reset += $_.name
$pass = $false
	}
if ($processing.AutomateProcessing -ne "AutoAccept") {
Write-Host "WARNING: The room '$($_.name)' is not configured to Auto Accept. Processing='$($processing.AutomateProcessing)'" -ForegroundColor Red
$not_auto_accept += $_.name
$pass = $false
	}
# Optional permission for allowing the external invites:
if ($processing.ProcessExternalMeetingMessages) {
Write-Host "The room '$($_.name)' is configured to process external (forwarded) meetings"
$process_external += $_.name
	}
if ($pass) {
Write-Host "INFO: All checks passed for room '$($_.name)'" -ForegroundColor Green
	}
}

Write-Host "Summary:"
Write-Host "There are $($deleted_subjects.count) rooms deleting the meeting subject"
if ($deleted_subjects) {
Write-Host $deleted_subjects -Separator ", "
Write-Host ""
}
Write-Host "There are $($organizer_added.count) rooms adding the organizer to the meeting subject"
if ($organizer_added) {
Write-Host $organizer_added -Separator ", "
Write-Host ""
}
Write-Host "There are $($deleted_bodies.count) rooms deleting the meeting body"
if ($deleted_bodies) {
Write-Host $deleted_bodies -Separator ", "
Write-Host ""
}
Write-Host "There are $($private_flag_reset.count) rooms clearing the private flag on meetings"
if ($private_flag_reset) {
Write-Host $private_flag_reset -Separator ", "
Write-Host ""
}
Write-Host "There are $($not_auto_accept.count) rooms not configured to Auto Accept"
if ($not_auto_accept) {
Write-Host $not_auto_accept -Separator ", "
Write-Host ""
}
Write-Host "There are $($process_external.count) rooms configured to process external (forwarded) meetings"
if ($process_external) {
Write-Host $process_external -Separator ", "
Write-Host ""
}
In this step you log in to the Pexip Infinity Administrator interface and add details of the Exchange deployment you are integrating with, including details of the service account username and password (based on the configuration you have just set up in Exchange).
From the Pexip Infinity Administrator interface, go to .
| Option | Description |
|---|---|
| Name | The name of this One-Touch Join Exchange integration. |
| Description | An optional description of this One-Touch Join Exchange integration. |
| Service account username |
The username of the service account to be used by the One-Touch Join Exchange integration. This must be in the format name@example.com. |
| Enable OAuth |
Leave this option disabled to continue using Basic Auth. (OAuth 2.0 is supported for Exchange in Office 365 only.) |
| Service account password |
(Available if OAuth has not been enabled) The password of the service account to be used by the One-Touch Join Exchange integration. |
| Advanced options | |
| Find Items Request Quota |
The number of Find Item requests that can be made by OTJ to your Exchange Server in a 24-hour period. The default of 1,000,000 should be sufficient for most deployments — for more information, see Frequency and limitations on calendar requests. We do not recommend increasing this quota unless you have deployed a dedicated One-Touch Join platform, because it will impact the performance of the Conferencing Nodes. |
| OTJ Exchange Autodiscover URLs | |
|
This section is optional and will generally only be required if the Autodiscover URLs in your deployment do not use a standard location. |
|
| Name | The name of this Exchange Autodiscover URL. |
| Description | An optional description of this Exchange Autodiscover URL. |
| Autodiscover URL |
The URL used to connect to the Autodiscover service on the Exchange deployment. If you are using Office 365, you may need to enter your autodiscover URL manually, particularly if you are using a hybrid Exchange deployment. If your OTJ room resources and service account are hosted on O365, then you should enter https://autodiscover-s.outlook.com/autodiscover/autodiscover.svc as the Autodiscover URL. The URL must end in .svc; URLs ending in .xml are not supported. |
Next steps
You must now configure the remainder of the One-Touch Join components on Pexip Infinity, as described in Configuring Pexip Infinity for One-Touch Join.