Using Pexip Connect for RealWear
The Pexip Connect for RealWear app works similarly to other installable Pexip Connect apps, allowing users to join meetings via a Pexip Infinity deployment. However, the Pexip Connect for RealWear app is designed specifically for use with a RealWear headset, so that the RealWear user can join an assisted reality (aR) video call that allows a remote participant or remote expert to see what the RealWear user is seeing, instead of seeing the user themselves. In turn, the remote participants can share relevant content with the RealWear user via the headset’s viewfinder screen.
In addition to the unique remote assistance use case that the Pexip Connect for RealWear app meets, the headset also allows the wearer to have a hands-free experience, using voice commands to navigate within the app and use meeting controls. As part of this, the Pexip Connect for RealWear app also has a streamlined join experience that enables users to simply scan a QR code for the meeting they need to join.
QR code generation for Pexip Infinity scheduled meeting is supported in Pexip Infinity from v32, although you can also generate QR codes manually. For more information, see Creating QR codes.
This guide provides information on how to install the Pexip Connect for RealWear app, as well as joining calls with the app, and how to use the available features.
In this guide:
Installing Pexip Connect for RealWear
The Pexip Connect for RealWear app is available for free from the RealWear App Marketplace at https://marketplace.realwear.com/app/com.pexip.connect.realwear. Follow the instructions to download and install the Connect app on your RealWear device.
![]() Once you’ve installed the app, you can find it on your headset by navigating to . You should see the app listed there and labeled PEXIP CONNECT, with the Pexip Connect app icon shown here to the left.
Once you’ve installed the app, you can find it on your headset by navigating to . You should see the app listed there and labeled PEXIP CONNECT, with the Pexip Connect app icon shown here to the left.
Getting started
When you first open the Pexip Connect for RealWear app you’ll see the main menu page:
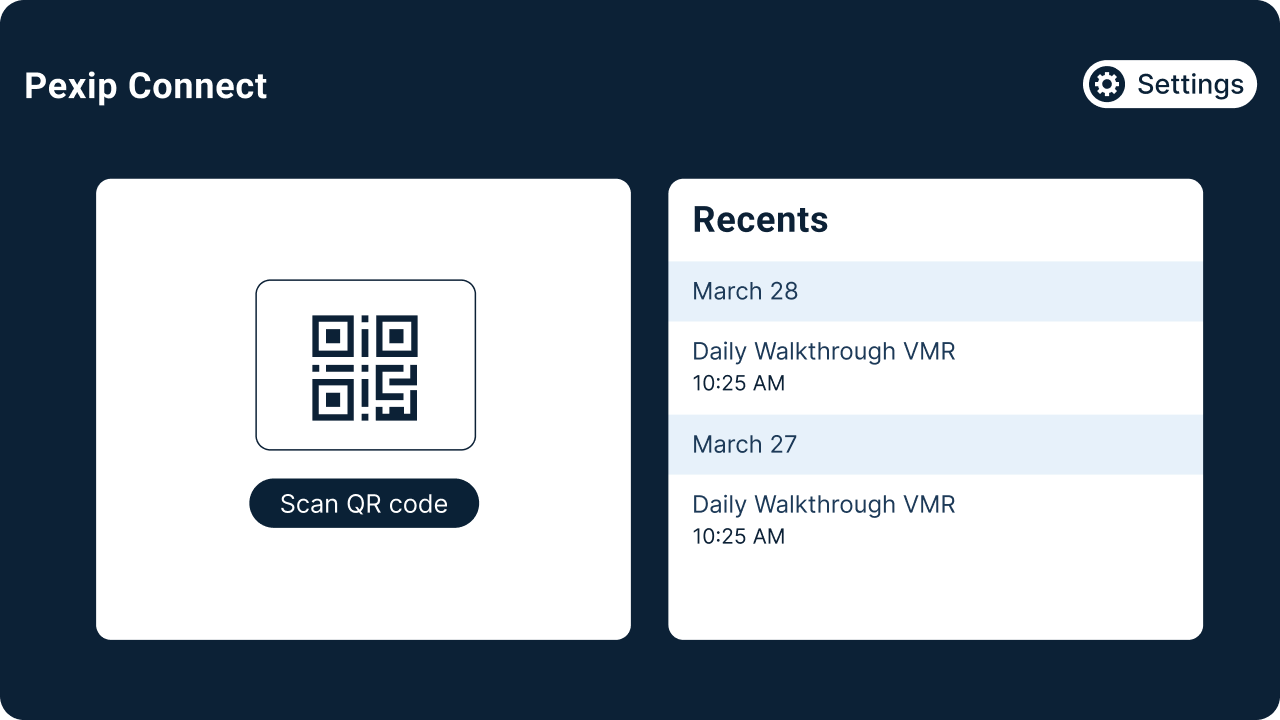
From this page you can join a call by either scanning a QR code or selecting a previously-called VMR from the Recents section.
If this is the first time you are using the Connect app, will not yet list any VMRs.
You can also access the app's settings from this page, where you can view information about the app and adjust the Quick join experience.
Allowing the Pexip Connect app to access your device
When you first use the Pexip Connect app to join a call, you are prompted to request permissions to use your device’s camera and microphone. Once you select you’ll be asked to allow access to the following required permissions:
| Permission/Description | Use |
|---|---|
| Allow Pexip Connect to take pictures and record video? | Access is required if you want to send video. |
| Allow Pexip Connect to record audio? | Access is required if you want to send audio. |
If you deny either of these requests, you can change the permissions at a later time by going to your device's permissions settings for the Pexip Connect app.
Settings
The following options are available from the  menu:
menu:
Joining a call
| What | How | ||||||||
|---|---|---|---|---|---|---|---|---|---|
|
|
|
||||||||
|
If you’ve previously joined a call via you will see a history of your calls in the section of the main menu page:
To join one of these VMRs, select it from the list. You can scroll through the list using your device's standard navigation commands.
If the VMR you are joining has a PIN configured, you will then be prompted to enter a PIN before joining. |
|||||||||
| Pre-meeting call settings |
If you have Quick join set to disabled (the default state), before you join the VMR you will see the pre-meeting page:
You see the name of the VMR you are joining, and a live preview of your camera image. From here you can set your call bandwidth, and set your device’s camera or microphone to on or off. Each of these settings can be changed after joining the call as well. To return to the main menu, use the standard device command Navigate back (for example, if you selected the wrong VMR from the list).
|
||||||||
| Entering the PIN |
For some meetings, you may be offered the option (or be required) to enter a PIN:
To allow for secure PIN entry, each number on the keypad has a randomly associated city name that changes each time a PIN is entered. To enter a PIN, select the PIN field, use the device’s speech keyboard to say the name of the city associated with each number in the PIN, and then select . If you are a Host, enter your Host PIN. If you are not a Host, the meeting organizer should have told you the PIN to use. If you haven't been given a PIN, simply select to join as a Guest, without entering a PIN. When you’ve selected you will join the VMR directly. |


Using in-call controls


Creating QR codes
To join a Pexip Infinity VMR, Pexip Connect for RealWear users scan a QR code. From version 32 onwards of Pexip Infinity, administrators can automatically generate QR codes that can be used to join supported meetings. Alternatively, you can manually create QR codes.
Automatically creating QR codes
Microsoft Teams meetings
To include a QR code in a Microsoft Teams meeting invitation, you must enable the "Alternate VTC dialing instructions" page and include the QR code on the page. You do this by appending the qrcode parameter to the PowerShell command used to configure the CVI provider. For more information, see Defining the CVI app behavior and grant interoperability.
Virtual Meeting Rooms
For invitations to any other VMRs, including scheduled VMRs and static VMRs, you can generate a URI to a webpage hosted on a Conferencing Node where the full set of join instructions for that specific VMR is shown, including the QR code. for more information, see Links to a join instructions page.
Manually creating QR codes
For deployments using Pexip Infinity versions prior to v32, you can easily create your own QR codes for any Pexip Infinity VMR. To do this, first compose the URL that the RealWear user will use to join the VMR, and then use a QR code generator to convert the URL into a QR code.
Composing the URL
The URL used by Pexip Connect for RealWear participants to join a VMR uses a subset of the variables used for other Connect apps. The format is:
pexip://<alias>?host=<domain>&name=<name>&pin=<PIN>&join=<join>
where:
| <alias> | is one of the aliases for the conference or service the user will join. |
| <domain> | is the IP address or domain name of the Conferencing Node (or reverse proxy if, for example, it is being used to host a customized version of the web app) the client should connect to in order to place the call. |
| <name> | is the name of the user who is joining the conference. |
| <PIN> | is either the Host PIN or Guest PIN, if required (note the Security considerations if these are included). |
|
<join> |
is 1 if you want the participant to automatically join the conference, bypassing the option to check their devices. |
For example, the URL to join the "Daily Walkthrough" VMR which has a PIN of "1234" would be:
pexip://daily.walkthrough.vmr@pexample.com?pin=1234&join=1
Converting the URL to a QR code
Once you have created the URL, simply go to any online QR code generator and use it to convert the text of the URL into a QR code.
Ensure that the generator does not automatically prefix the URL text with https://
Download the resulting QR code and send it to the meeting participants.

Release notes
Change log
| App version | Released | Changes |
|---|---|---|
| 1.2.0 | October 2023 |
|
| 1.1.0 | June 2023 |
|
| 1.0.1 | April 2023 | WearHF is now responsive in all screens. |
| 1.0 | March 2023 | Initial release. |
Known limitations
| Ref # | Limitation |
|---|---|
| 32830 | A RealWear user who is admitted to a locked Pexip Infinity VMR by the meeting Host may experience media negotiation failure after joining. This will cause the other VMR users to neither see nor hear the RealWear user, and in turn the RealWear user will only be able see but not hear the other VMR participants. A fix is planned for a future release of Pexip Infinity. |