Installing the Management Node — VMware hypervisors
Before installing the Management Node we recommend that you review the VMware configuration prerequisites and the Installation checklist.
Installation of the Management Node is a two-step process:
-
Deploying the VM template: this creates a new unconfigured instance of a generic Management Node VM.
The process for deploying the template in a VMware hypervisor environment is described below.
- Running the installation wizard: after deploying the Management Node template, the installation wizard allows you to enter the basic configuration details for your Management Node VM.
This flowchart provides an overview of the basic steps involved in deploying the Pexip Infinity platform on VMware:

Deploying the Management Node template
If an ESXi host is being managed by vCenter Server, all administration must be performed via vCenter Server. Do not log in directly to the ESXi host; configuration changes made in this way may be lost. To ensure that ESXi hosts being managed by vCenter Server are accessible via vCenter Server only and are not directly accessible, you should put them in Lockdown mode. Lockdown mode forces all operations to be performed through vCenter Server.
To install a new instance of a Pexip Infinity Management Node using the vSphere web client:
-
Either:
- Ensure the VM Manager can access the Management Node OVA image file hosted on the Pexip download page. or
- Download the Management Node OVA image file from the Pexip download page to your local machine.
- Log in to the VM Manager (vCenter Server).
-
If you are using VMware 7.0u3 or later you must import an intermediate certificate bundle to enable VMware to trust the OVA image:
- Go to https://dl.pexip.com/resources/certificates/index.html, and download the intermediate certificate PEM file 2022_10-bundle.pem.
- Import the PEM file into VMware as described in https://kb.vmware.com/s/article/84240.
Note that:
- If you do not import the certificate bundle, you can still deploy the OVA image but you will have to ignore the untrusted certificate warnings.
- Earlier versions of VMware do not require the certificate bundle as they do not perform the same level of validation.
- Select VMs and Templates.
- Click on the menu and select Deploy OVF Template....
The Deploy OVF Template window will open. -
At the Select template step, either enter the URL to download the Management Node OVA imge file, or to the location of the Pexip Infinity OVA file, and select
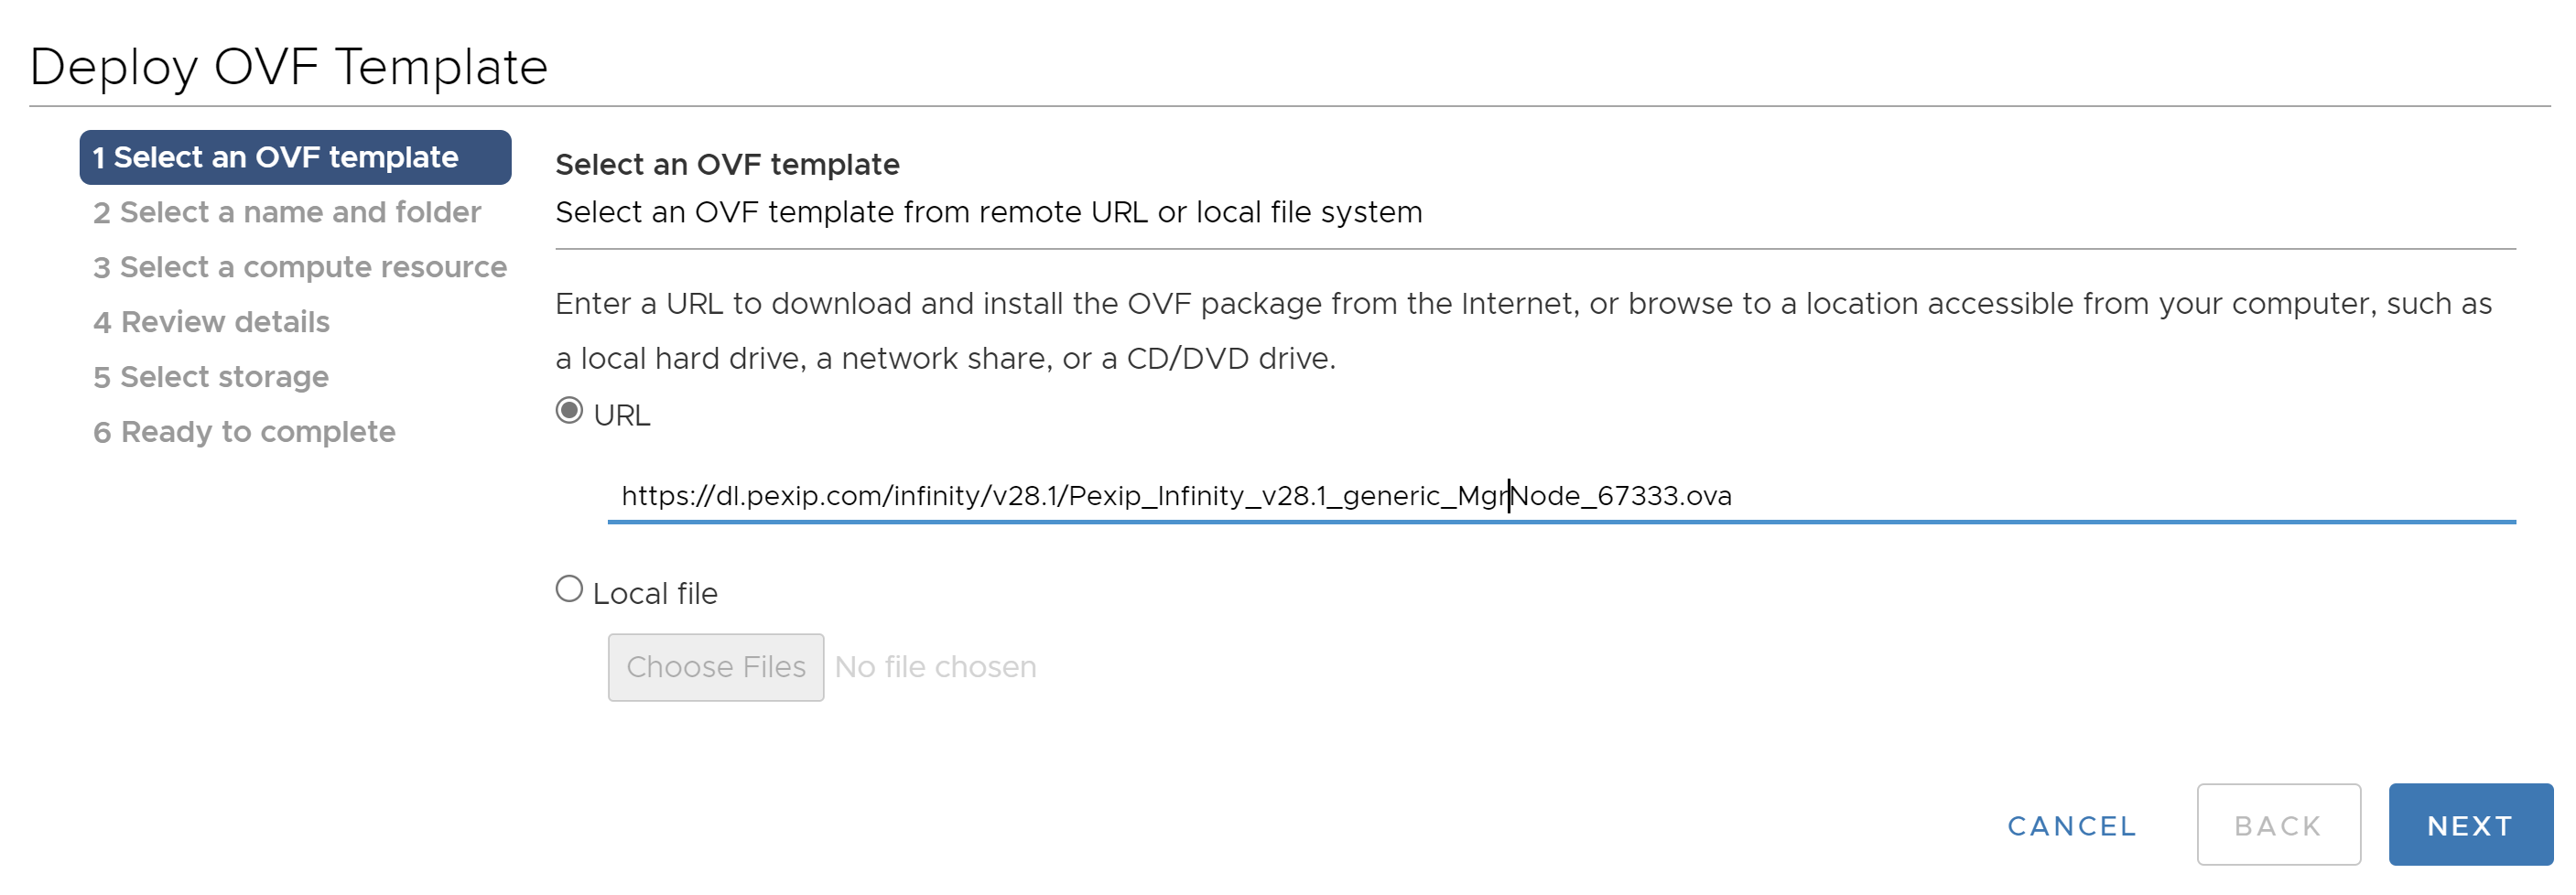
-
If you are using VMware 7.0u3 or later, a Source Verification pop-up appears (even if you have imported the certificate bundle).
Verify that the certificate thumbprint shown is AF:1F:4D:92:2D:DF:5F:81:1C:C2:BC:D5:38:28:14:75:0A:D9:02:0E and then select to proceed.
-
At the Select name and folder step:
- Enter an appropriate Name for the Management Node. This name is used in the VMware interface to identify this Management Node virtual machine (VM).
- Select the location or datacenter within which the Management Node will be located.
- Select .
- At the Select a compute resource step, select the host, cluster, resource pool or vApp in which to run the template, and select .
-
At the Review details step, you may see the following warning:
This warning message is shown whenever any advanced settings are part of an OVA deployment. Here, the advanced configuration options that are being referenced are those mandated for the US Department of Defense JITC (Joint Interoperability Test Command) certification.

Select .
- At the License agreements step, read the license agreements, and if you agree to the terms select and then .
- At the Select storage page, select a Thick virtual disk format, a VM Storage Policy and Datastore to be used, and select .
- At the Select networks step, select the VM Network and IP configuration, and select .
- At the Ready to complete page, review the configuration and select .
Progress is shown in the Recent Tasks tab at the bottom of the screen. When the template has been deployed successfully, a green tick will appear.
Enabling automatic startup
You can only enable automatic startup after the Management Node has been deployed.
To enable automatic startup using the vSphere web client (HTML 5):
- Log in to the VM manager (vCenter Server).
- From the navigation panel, select the tab and navigate to the host server on which the node's VM is installed.
- From the main panel, select the tab.
- From the left-hand panel, select Virtual Machines > VM Startup/Shutdown.
- At the top right of the page, select .
- In the System influence section, select Automatically start and stop the virtual machines with the system.
- Select .
Running the Pexip Infinity installation wizard
To run the installation wizard, which configures the Management Node, you must open a console window on the Management Node VM.
Opening a console window
- Using the vSphere client, log in to the Management Node's VM Manager (vCenter Server or, for stand-alone deployments, the ESXi host).
- Power on the new Management Node VM (if it is not already powered on).
- Right-click on the new Management Node VM and select > Web Console.
Running the installation wizard
-
At the prompt, enter the username admin.
The display reads:
You are required to change your password immediately (root enforced)Enter new UNIX password: -
Create a password for the Management Node operating system by typing the password, pressing Enter, retyping the password, and pressing Enter again.
-
Ensure you record the password in a secure location. After you have finished running the installation wizard you will not need the password again unless you need to access the Management Node using SSH.
You are presented with another login prompt:
[sudo] password for admin: -
Log in again with the password you just created.
The Pexip installation wizard starts.
-
Follow the prompts to set the following configuration for the Management Node.
If you press enter, the default value is applied:
Setting Default value Multiple entries allowed? Can be changed via Pexip Infinity Administrator interface? IP address As assigned by DHCP, otherwise 192.168.0.100 No No Network mask As assigned by DHCP, otherwise 255.255.255.0 No No Gateway As assigned by DHCP, otherwise 192.168.0.1 No No Hostname As assigned by DHCP, otherwise <no default> No No Domain suffix As assigned by DHCP, otherwise <no default> No No DNS servers As assigned by DHCP, otherwise 8.8.8.8 Yes, if separated by a space or comma Yes NTP servers As assigned by DHCP, otherwise two of the following:
- 0.pexip.pool.ntp.org
- 1.pexip.pool.ntp.org
- 2.pexip.pool.ntp.org
- 3.pexip.pool.ntp.org
Yes, if separated by a space or comma Yes Web administration username admin No No Web administration password <no default> No Yes Enable incident reporting (yes/no) <no default> Yes Contact email address <no default> No Yes Send deployment and usage statistics to Pexip (yes/no) <no default> Yes The installation begins and the Management Node restarts using the values you have configured.
Next steps
After you have run the installation wizard, you must perform some preliminary configuration before you can then deploy a Conferencing Node. See Initial platform configuration — VMware for more information.